
Hackers, malware, and spam! Oh, My! It’s hard to manage an online business, and everywhere you go you hear all the horror stories of Internet Security. How do you protect yourself? How do you protect your business website?
First, I always tell my clients to make sure you have a good automatic backup. Next, secure your website from the first point of entrance.
This is where CloudFlare helps Secure Websites.
Instead of installing a plugin or something on your server, CloudFlare protects you before anyone steps inside. It’s like having a doorman announcing everyone!
CloudFlare protects and accelerates websites that are part of its community. All web traffic is routed through their system after you register and configure your website with CloudFlare.
CloudFlare also speeds up your website. Sounds too good to be true?
Well, CloudFlare is only part of having a secure website. There are other things that you need to do to keep those monsters out. But let’s start with before anyone ever steps foot on our website.
You need to create a FREE account at CloudFlare.com. Then change your DNS with your register or web host. CloudFlare has excellent support documents on how you to do this. Following the instructions and CloudFlare will clone your current settings. It may take a couple of hours to a full day before the changes take place. You can come back to CloudFlare to see when they are up and running.
Setting up CloudFlare to speed up and your secure website:
- Create a Free account by going to http://www.cloudflare.com and click on Sign Up.
- Enter your email and a secure password. (Using an alias is a good idea if you are going to have other people help you manage your accounts. )
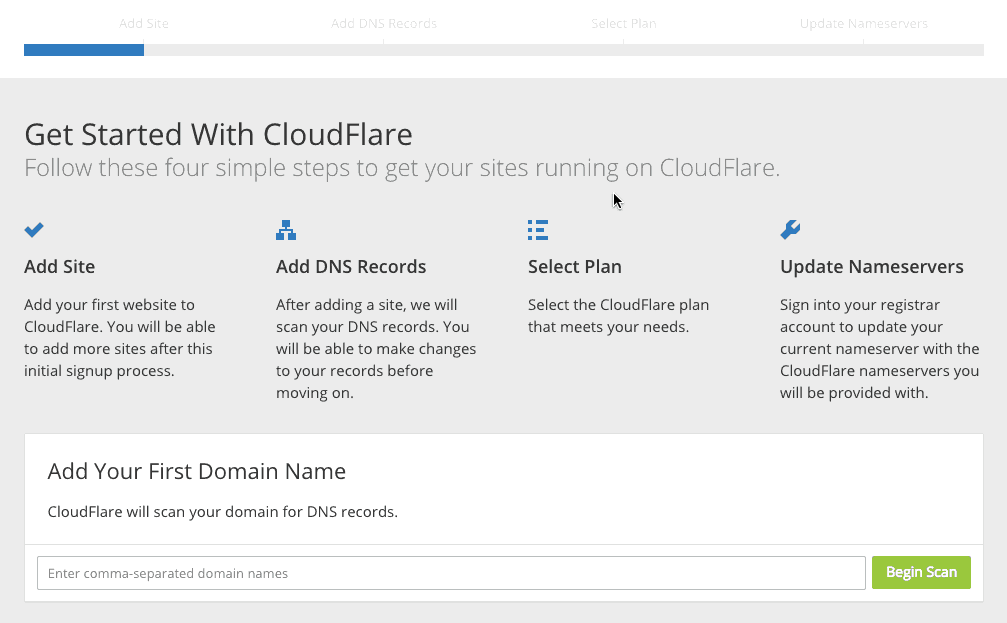
- Enter your websites Domain name (example.com, etc) and click Begin Scan:

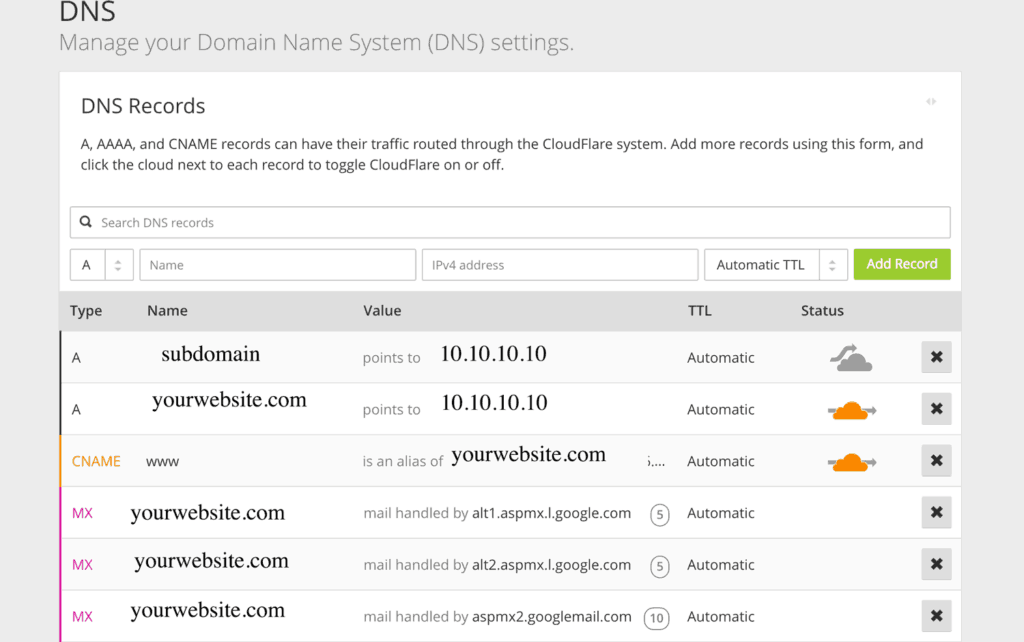
- When the scan is complete, you will see the copied records. You can choose to enable subdomains that need protection as well.

- Select a plan that works for your business. I recommend to start with the FREE version first and see if you need to upgrade later on.
- Now you will see the nameservers you are assigned. Write these down. You will need to change these at your register or web hosting company. I prefer to change this at the where you registered the website. This way if I wanted to switch a website off a hosting company I could do it in an hour.
- After you make the needed changes with your registrar or hosting company, you may have to wait up to 72 hours. Your website will not experience any downtime. You may need to come back to CloudFlare to check the status. When you login to CloudFlare click on the website that you are working with and click on Overview. It should say ‘Active on CloudFlare.’
Once configured you have many options in CloudFlare.
Out of the box a secure website. CloudFlare protects your site against known bad networks and browsers. These hackers never even step foot on your website. Hackers won’t even know what hosting company or any server details you are using because everything will be going to CloudFlare first.
There are more advanced things that you can do on CloudFlare, but be careful. While this tool works great, changing settings could also down your website or create issues. For example, if you enable caching, realize that changes you make on your website may not be seen online. You may want to read some of the help or google some of the settings before experimenting. Keep a log of the changes you have made, so you can change them back if needed.
I trust all my clients and my sites with CloudFlare, and it’s a great tool to protect your online business. Try it out and see how it works for you. Any questions comment below or reach out to me on social media. Welcome to your secure website!
To Your Tech Success,
-Terry